Basic Vocal Processing with Linux (was: Behringer UV1 and Linux)
Now that I work remotely full time a large part of my day is spent, like most remote workers, in video calls. For a number of reasons, I prefer using a headset rather than a mic and speakers. For an even longer list of reasons, I prefer using an analog broadcast-style headset. I’ve had several of these but splurged last year on a Sennheiser HME 27, which is an isolating headset with a boom mounted condenser mic. This is overkill for video conferencing, but I often use the headset for studio projects as well and the extra sensitivity of the condenser mic is handy.
Previously I used several Yamaha CM500 headsets which are great. The Audio Technica BPHS1 is a good option in between these in price.

Most broadcast headsets have a cable with both an XLR and 1/4" TRS connector, so it’s most convenient to use it with an outboard audio interface. Since I dabble in audio recording at home, I’ve accumulated several of these, and almost all the recent USB-attached variety work out of the box with no special drivers using Linux.
One of the major reasons that I like this setup is that the headphone output on USB recording interfaces will always provide monitoring, which means that my headphones will have a mix of the audio coming in from the mic and the audio being sent from the computer. The balance of the two can be controlled with a knob on the interface, which allows me to match the level of my voice with the other callers. It also prevents me from doing that embarrassing shouty-thing that people do when they try to have a conversation with headphones on.
One drawback of this scheme is that I have a boomy basso voice, and listening to it in headphones can lead to ear fatigue (I imagine this is a common complaint of people who listen to me without headphones as well.). I could solve this by adjusting myself down in the headphone mix, but then I start talking louder.
Processing
In voiceover or vocal recordings, it is common to apply a high-pass filter (HPF) around 80-100Hz, sometimes higher depending on the sound you’re looking for. This doesn’t completely remove content below the cutoff frequency, but it does gently roll off the level of the low frequencies so that they don’t dominate the audio.
Although it is possible to use software on the host to high-pass the incoming signal in this way, if I want to hear the high-passed audio in my headphones, it means sending the audio from your mic to the host, processing it, and then sending it back again to the headphones. Depending on the system you’re using, the delay can be long enough that the audio in your headphones sounds like an echo, which is annoying. So ideally, we would apply the high-pass between the microphone and the audio interface.

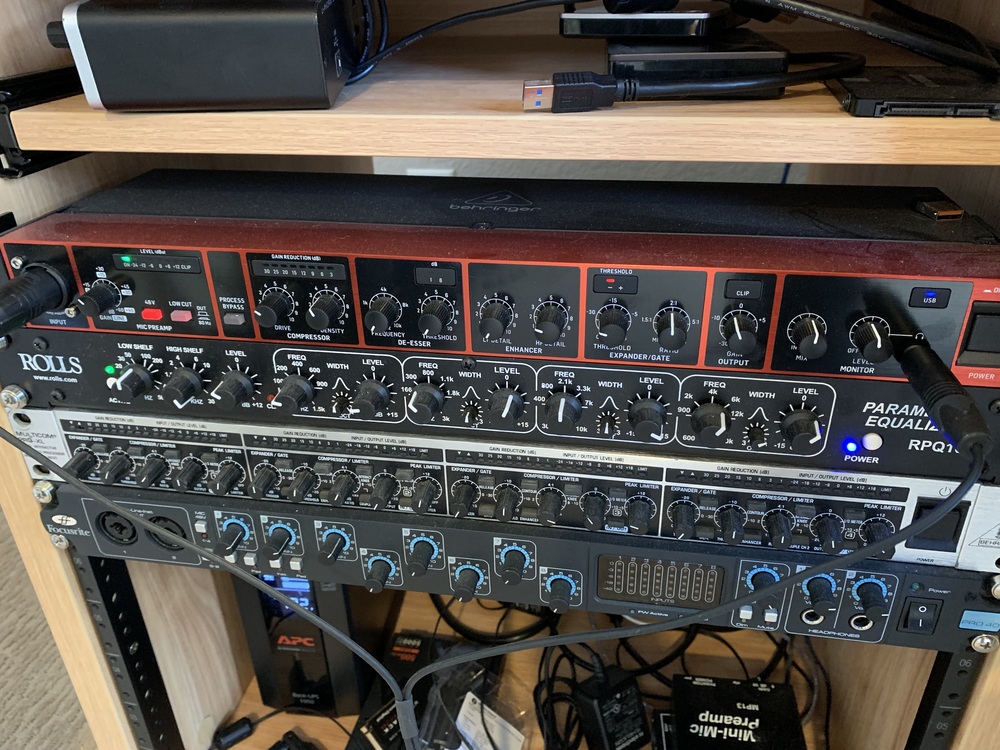
In ancient times, each channel of a giant studio mixing console had a long column of tiny knobs, each of which performed some important purpose. These columns, often referred to as strips, would each have a phantom power supply for condenser mics, a small amplifier providing gain to mics with low output, a parametric equalizer to allow boosting and cutting of the signal around certain frequency centers, and a noise-gate to cut out background noise when you aren’t speaking. Strips on big consoles would often also include a high pass filter to reduce boominess, a “de-esser”, which tames sibilance when you speak s-sounds, and a compressor, which we’ll return to later. These are the fundamental tools for taming the wild dynamic range of human voices for recording to magnetic tape, and they’re the source of the vocal character that we’re accustomed to when listening to radio and TV commentary.
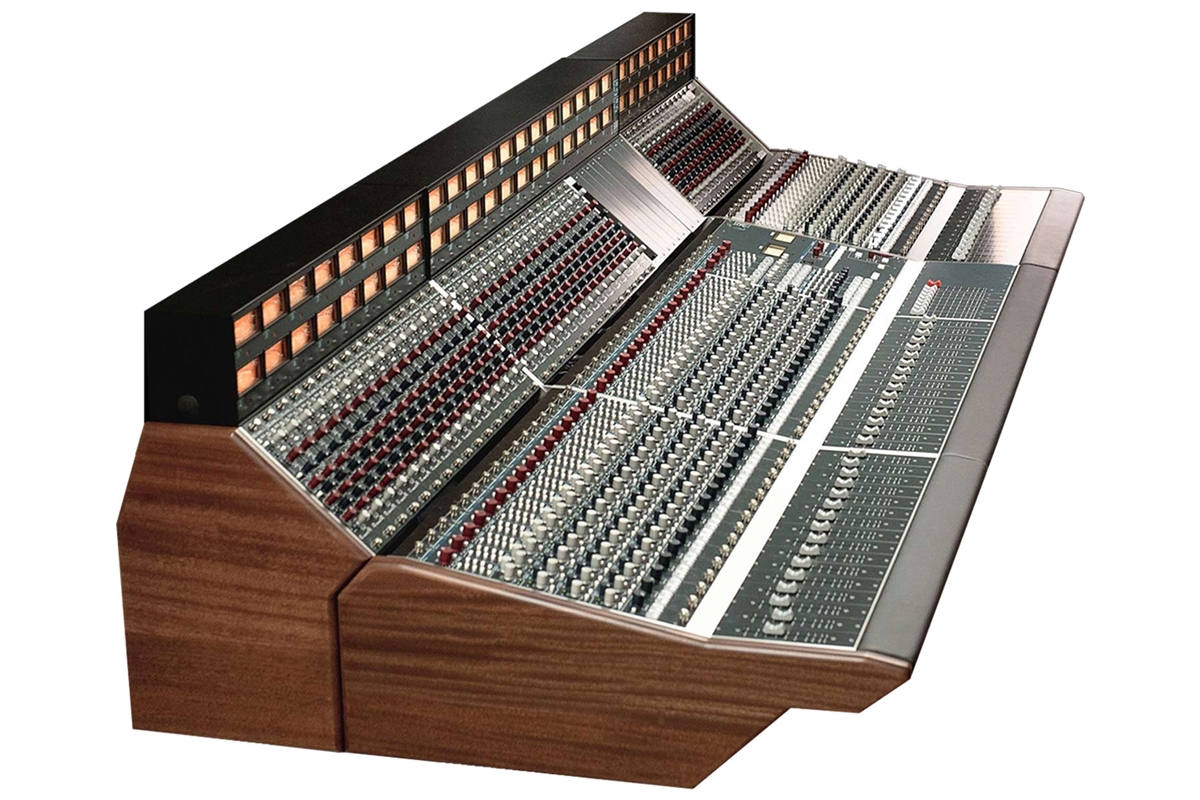
Small broadcast and recording studios need all this stuff too, but it doesn’t make sense to have a giant mixing console if you’re only recording one or two mics at a time. To fill this need for smaller studios, audio companies sell hundreds of models of rack-mounted boxes that function like one of those columns on a mixer, and so of course we refer to them as channel strips.
Almost all strips include something called a compressor, which is a little more difficult to explain, but is probably one of the most important processes for voice audio. If you’ve ever listened to a radio announcer and wondered why their voice seems to sound so big, the answer is compression.
You can think of a compressor like this: imagine that you’re standing in front of an audience with a microphone, and in front of you is a large speaker with an amplifier attached. A tiny audio-engineering pixie stands atop the speaker with it’s hands resting on the volume knob on the amp. The room is large, so the pixie turns the volume knob most of the way up. You hold the mic up to speak and clear your throat, unaware of how loudly this will sound through the speaker. Our pixie, however, is very quick, and within a millisecond of the start of this loud sound it turns the volume knob down by half, sparing the audience from a spike in volume. Embarrassed, you move the mic away from your mouth and whisper an apology to the audience. The pixie, recognizing that the audience will not hear your words, quickly turns the volume knob back to its original position. Even though you were speaking softly, the amplifier made up for it.
A compressor does the job of this pixie, and usually has controls that allow the user to control how quickly it responds, how aggressively it should turn down the volume, how long it should wait to turn it back up and how quickly, etc. Compressors are the key to capturing the wide dynamic range of the human voice without assaulting the ears of listeners.
Some other useful links about compression and vocal processing:
The Complete Guide to Audio Compression and Compressors
My Setup
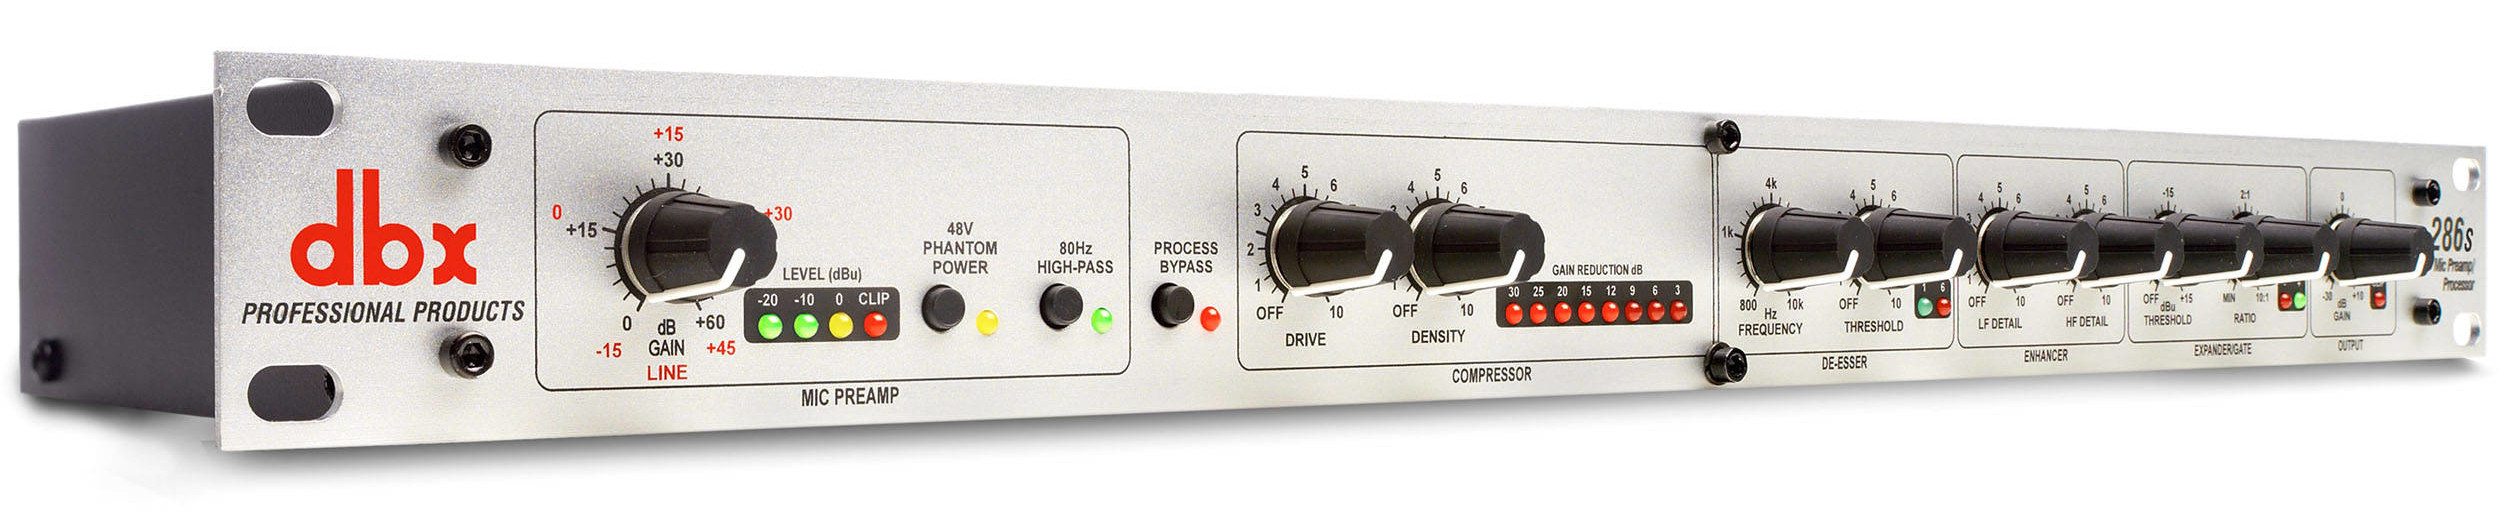
Since all the audio I send to my computer is via my headset and I’d like to do some of this basic vocal processing on my voice, it makes great sense to use a channel strip. A popular and relatively inexpensive channel strip is the DBX 286S. Sadly, it lacks a high-pass filter, although it has an effects loop which means that a small high-pass filter like s Rolls Audio SX21 can be inserted.
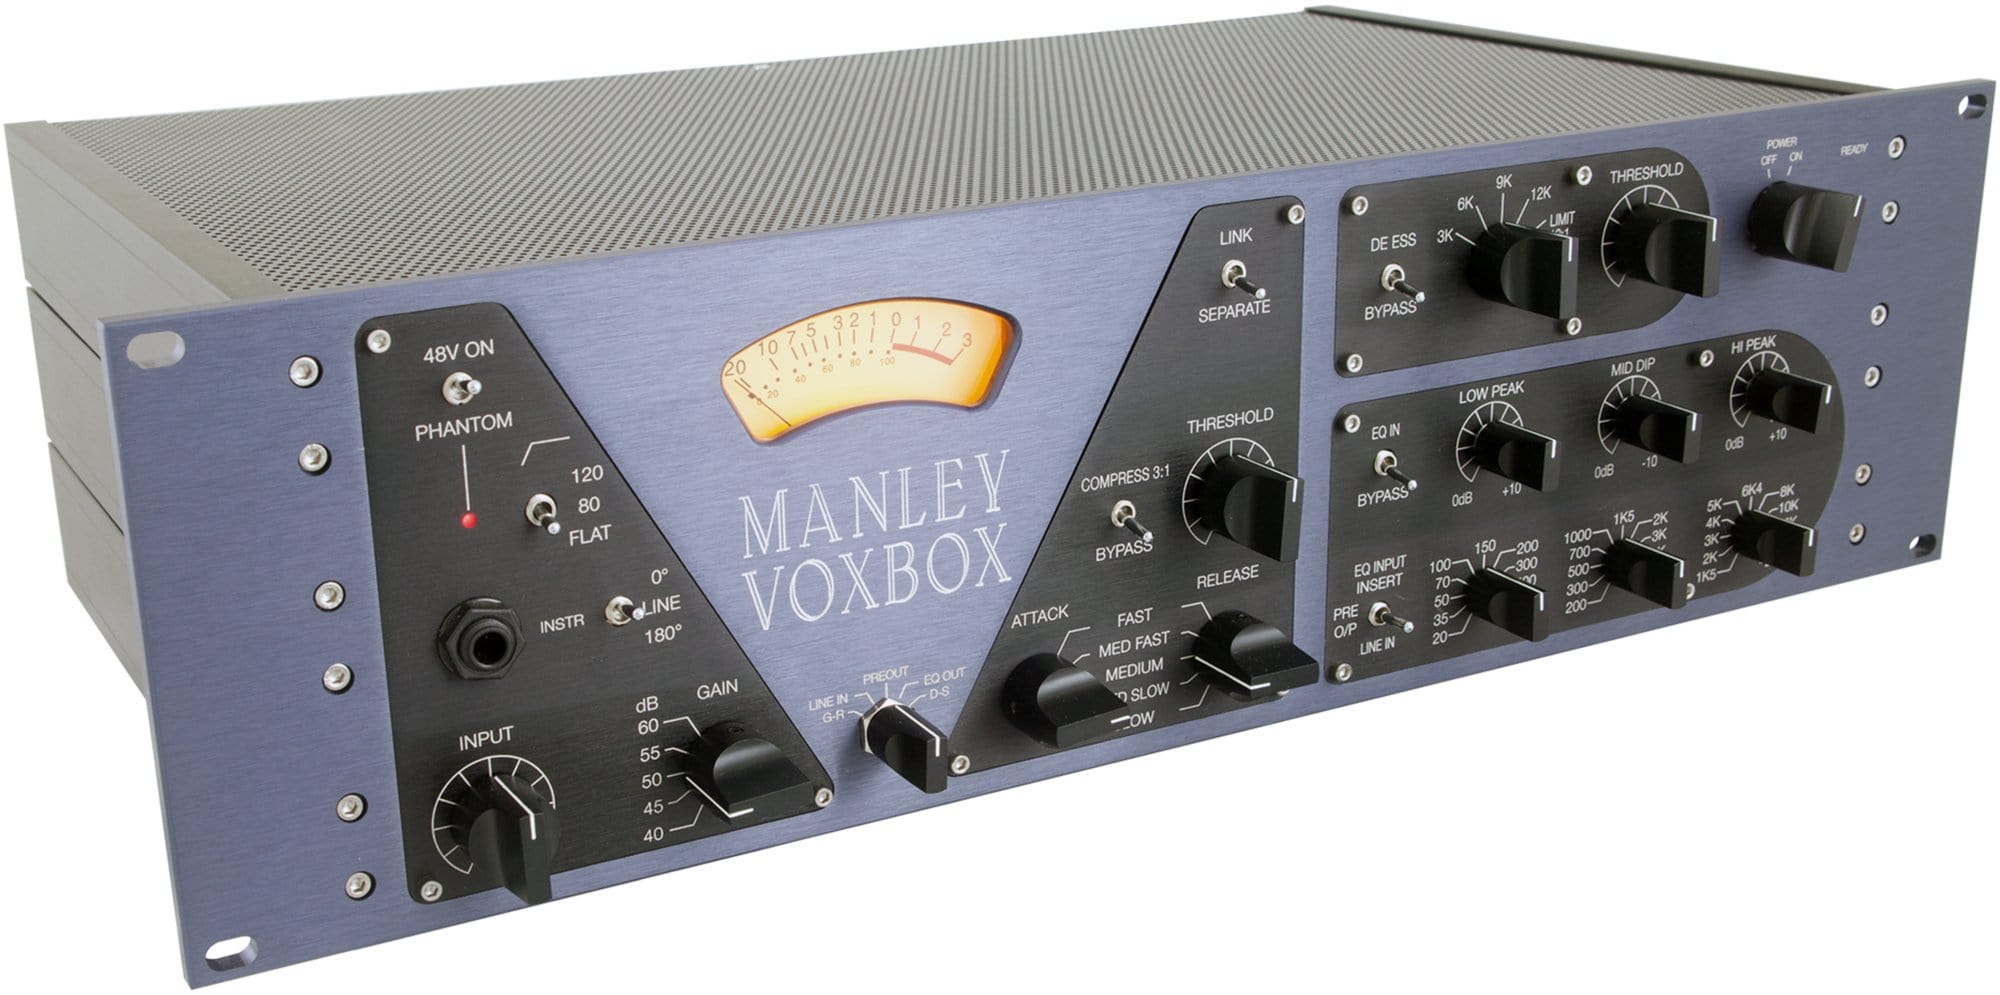
Since Channel Strips are also marketed to high-end recording studios, it is possible to buy an all-vacuum tube ultra-high spec channel strip like the Manley Vox Box, for many thousands of dollars. These tube-filled monsters have eye-pleasing analog VU meters, delightfully massive knobs, and gigantic mil-spec chassis. Although I’d be delighted to receive one of these as a gift, in practice, even the lowest-end stuff today is plenty good for my needs.
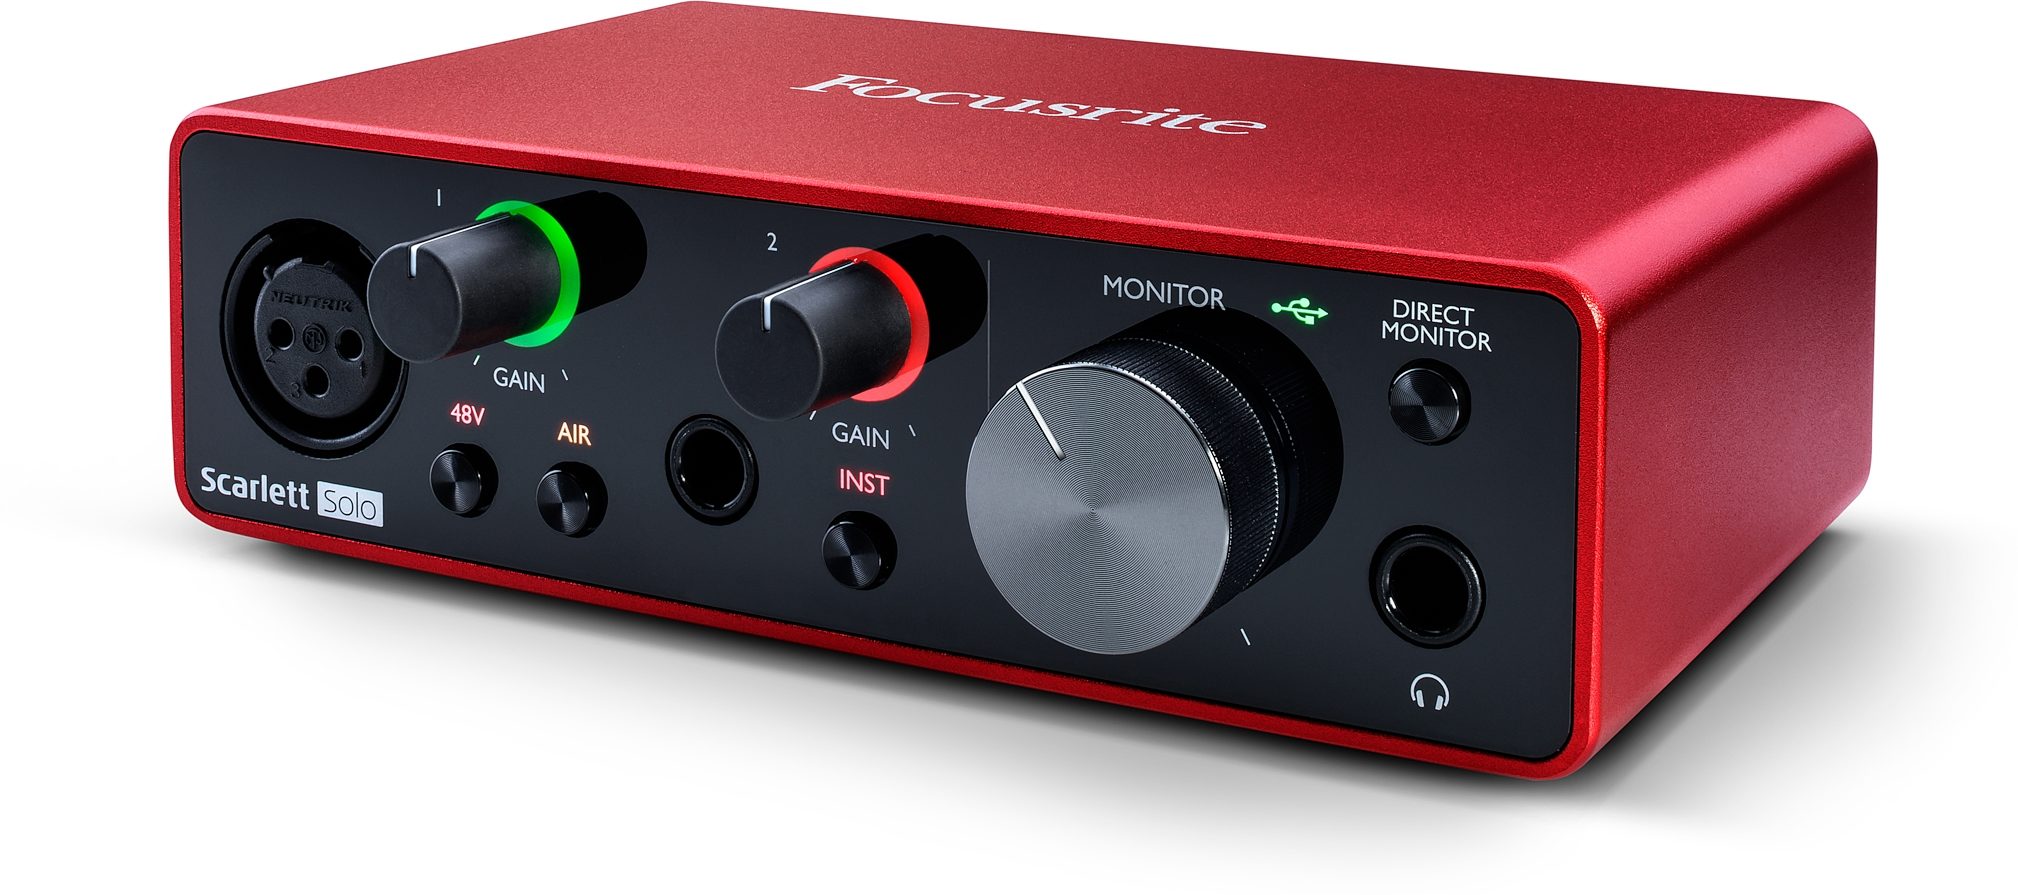
To use a channel strip like a DBX 286s with a computer is pretty easy if you have any of the dozens of excellent models of USB audio interfaces like a Focusrite Scarlett Solo, or the lower-priced but well spec’d Behringer UMC interfaces. The headset mic plugs into the channel strip, and the output of the channel strip is connected to the input of the interface with a patch cable. Finally, the headset’s headphone jack is connected to the headphone output of the USB Interface. This way, our headphones get a mix of the audio coming from the computer and the input signal coming from the channel strip, so that I am hearing my voice after processing and I can hear the changes I’m making on the fly.
An exciting development was the introduction of hybrid channel-strip USB-audio interfaces like the PreSonus Studio Channel or the ART VoiceChannel, which eliminate the need for a separate channel strip and audio interface.
The first few examples of these were somewhat pricey at around 500$ USD, but recently Behringer released the UV1 strip, which is comparable in features to the DBX 286s but with a USB interface and available for around 180$ USD. An important feature of the UV1 is that it requires no drivers, which means that it can work out of the box with Windows, OSX, or Linux, and won’t be forced into obsolescence when drivers stop being available in a few years.
The UV1 includes an effects loop, which allows me to send the audio signal out to another device and to accept the modified return signal, which is then sent on to the PC. In the effect loop on the UV1 I have a Rolls Audio RPQ160b Parametric Equalizer, which is a single space, rack mount three-band parametric equalizer with a high-pass and low-pass filter. It’s inexpensive and has great specs; if you have trouble with low frequency content it’s an easy fix, but definitely not hard requirement.
The UV1 shows up as an ordinary source/sink pair in Pipewire, and so using it as the primary audio interface is just a matter of selecting it in pavucontrol or whatever you prefer as your software mixer.
One drawback of the UV1 compared to an ordinary USB audio interface is that the input is mono, so it wouldn’t be suitable for recording stereo sources, but as a vocal unit its fine.
Processing in Software
As I mentioned earlier, it’s also possible to perform dynamics processing on the host, using a package like the excellent EasyEffects, or some VST host like Carla. I prefer to do my vocal processing in hardware since there’s zero latency, I can see my settings at a glance, and it’s convenient to be able to simply tweak a knob on the channel strip if I need to make a change.
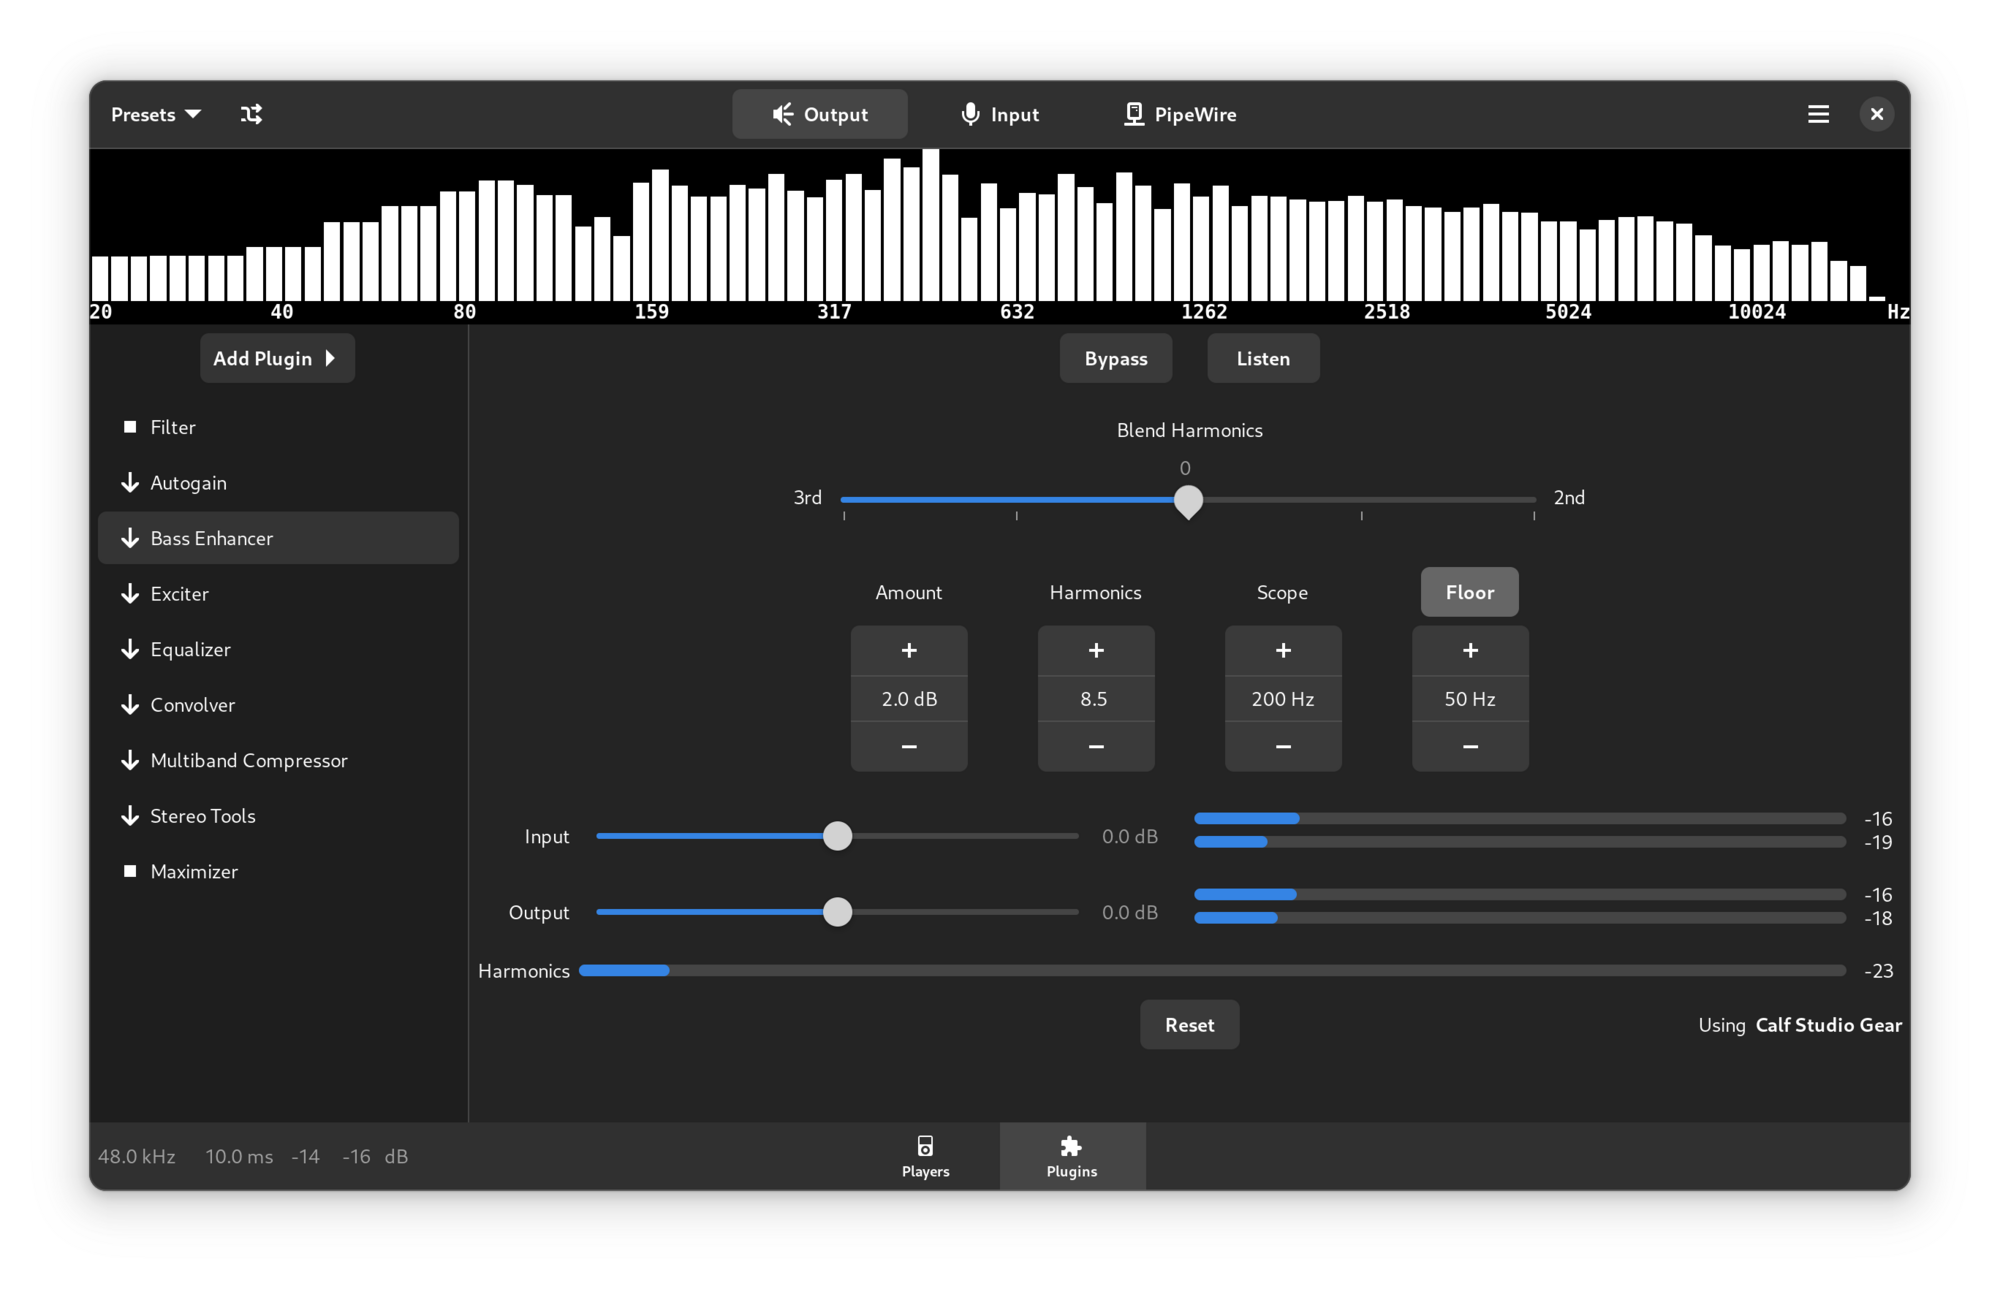
The software processing is, however, incredibly useful for me in processing the output from applications running on the host, especially video conferencing software where individual attendees volume levels may vary. By placing an Expander/Limiter plugin on the output of an application like Webex, I can ensure that speakers never exceed some sane volume level. Because Pipewire offers very low latency, the time delay for this processing is negligible, and setting up the processing is much simpler than when using another low-latency audio framework like JACK.
Issues with Linux and the Behringer UV1
I initially encountered a few frustrating issues with the UV1, all of which have now been corrected. When first connecting the UV1 to my machine, for convenience I reused the USB cable that had connected my existing USB interface. I got numerous errors in dmesg and the device wouldn’t work. I swapped out the cable (which had been working fine with the old interface for years) for a newer cable (I’m not sure if it was the one included with the UV1 since I’d mixed them up by this point) and that issue went away. No knock on the UV1 here as I’ve had several interfaces that exposed quality issues with cables I had lying around.
The next issue appeared when I used pavucontrol to select the device profile Stereo Audio Duplex, the UV1 would work correctly as an input, but no audio would be sent from the headphone output even though Pipewire seemed to be sending to the device without issue. Confouindingly , if I selected either the Analog Input or Analog Output profiles, the device would work fine as either an input or an output.
After some digging, I found a note in /usr/share/alsa/cards/USB-Audio.conf which mentioned that a handful of USB audio devices don’t use the first PCM device on the card for digital audio. So I switched the device profile for the UV1 from Stereo Analog Duplex to the Duplex IEC958 option. Now both the analog input and output work correctly. To prevent needing to use the bogus profile, I edited the file:
/usr/share/alsa/cards/USB-Audio.conf
and in the section:
USB-Audio.pcm.iec958_device
I added:
"Behringer UV1" 999
"UV1" 999
After rebooting, the IEC958 Duplex profile was gone, and the Analog Stereo Duplex profile works as expected. I think only one of those entries is required but I’m not sure which is correct as I haven’t had a chance to reboot after changing it. I’ve reported this issue to the alsa-devel list, so hopefully a future release of asound will include the modification.
Next, I still see errors in dmesg:
usb 3-4.1.3.1.1.1: clock source 41 is not valid, cannot use
and I was experiencing periodic short gaps in audio playback. I assumed the error message was related to the audio glitch, and spent a great deal of time in back and forth with the alsa list trying to track the issue down.
Some users on the kernel bugtracker found that including a kernel boot option seems to correct this issue:
On Ubuntu this means updated /etc/default/grub to include:
GRUB_CMDLINE_LINUX="snd_usb_audio.implicit_fb=1"
With these changes in place, the device is finally working perfectly. I still see the warning about clock source 41 being invalid, but this doesn’t seem to be an issue, and several other users on the Alsa mailing lists seem to confirm that its innocuous.